[Servlet] 수동으로 간단한 웹 앱 만들어보기
이클립스를 사용하지 않고, 처음부터 수작업으로 작업해보자. 즉, 간단한 웹 페이지를 만들고, GET, POST 요청을 처리할 간단한 서블릿을 만든 후, 이를 톰캣 서버에 수동으로 올려 작업해보자.
이러한 과정은 사실 실제 웹 개발에서는 너무 복잡하고 에러가 자주 발생할 수 있어 이클립스와 같은 IDE를 사용하는 것이 일반적이라고 한다. 하지만 정말 만에 하나라도 IDE를 사용할 수 없거나, IDE로는 해결할 수 없는 문제가 생길 때 수작업을 이용한 방식을 이용하면 해결할 수 있을 지도 모른다. 혹시 모르니 알아두는 것도 나쁘지 않을 지도 모른다.
근데 사실 왠만하면 IDE 사용하자. 스트레스가 이만저만이 아니다.
수작업 웹 프로젝트 준비
먼저 다음과 같이 프로젝트 폴더를 만들었다. “MyFirstManualWebApp”이라고 하였다. 그리고 그 안에 웹 앱 환경설정에 필수인 폴더 “WEB-INF”를 만들었다. 그리고 그 안에 여러 폴더들을 만들고 파일 하나를 외부에서 복사하여 가져왔다.
MyFirstManualWebApp
\---WEB-INF
    |   web.xml
    |
    +---classes
    \---lib
나중에 서블릿 클래스 파일(.class)이 저장될 classes와, 서블릿 관련 api를 사용할 수 있는 jar 파일을 라이브러리로 가져와 사용하기 위한 lib 폴더를 생성한 것이다. 그리고 웹 설정 파일인 web.xml도 복사하여 가져왔다.
web.xml 파일은 톰캣이 설치된 폴더에서, webapps\ROOT\WEB-INF 폴더 내부에 있던 web.xml 파일을 복사하여 가져온 것이다. 혹시 모르니 webapps\ROOT\WEB-INF 폴더 내에 있던 web.xml은 건드리지 말고 복사하여 가져오자.
이번에는 브라우저에 보여줄 간단한 웹 페이지를 만들어보자. 루트 폴더에 index.html 파일을 만든다. 필자는 다음과 같이 만들어보았다.
<!DOCTYPE html>
<html lang="ko">
<head>
<meta charset="UTF-8">
<meta http-equiv="X-UA-Compatible" content="IE=edge">
<meta name="viewport" content="width=device-width, initial-scale=1.0">
<title>제 홈페이지입니다.</title>
<link rel="stylesheet" href="style.css" />
</head>
<body>
<div id="container">
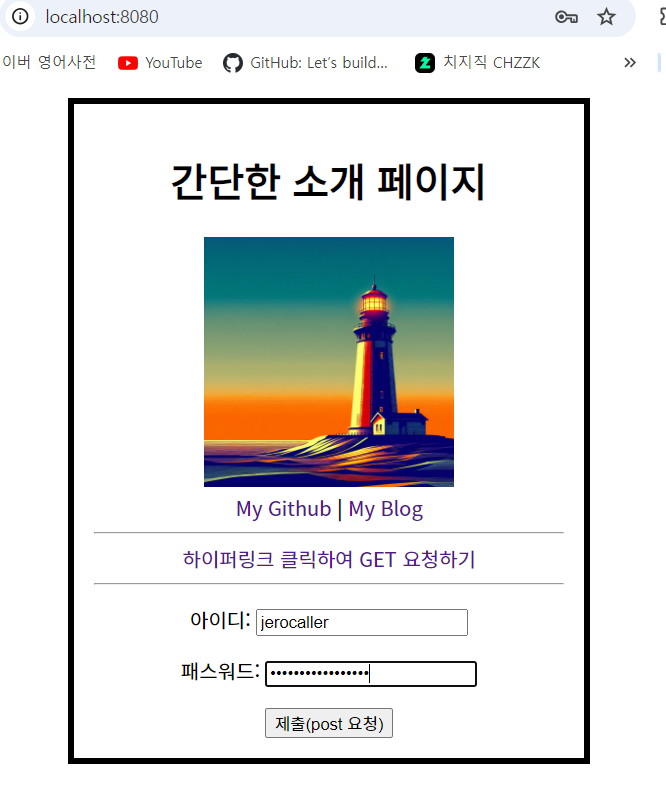
<h1>간단한 소개 페이지</h1>
<img src="images/lighthouse.jpg" width="200em"/>
<div class="mys">
<a href="https://github.com/JeroCaller" target="_blank">My Github</a>
<span>|</span>
<a href="https://jerocaller.github.io/" target="_blank">My Blog</a>
</div>
<hr/>
<div>
<a href="">하이퍼링크 클릭하여 GET 요청하기</a>
</div>
<hr/>
<div class="form-area">
<form action="" method="post">
<label for="id">아이디: <input type="text" placeholder="아이디 입력" name="id"/> </label>
<label for="password">패스워드: <input type="password" placeholder="비밀번호 입력" name="password"></label>
<input type="submit" value="제출(post 요청)" />
</form>
</div>
</div>
</body>
</html>
index.html
#container {
    border: 5px solid black;
    width: 50%;
    padding: 1em;
    margin: 0 auto;
    text-align: center;
}

.form-area {
    margin-top: 1em;
}

form > label {
    display: block;
    margin: 1em;
}

a {
    text-decoration: none;
}
style.css
프로젝트 폴더 구조는 다음과 같이 변경되었다.
root/  // 편의상 root라고 하겠다.
│  index.html
│  style.css
│
├─images
│      lighthouse.jpg
│
└─WEB-INF
    │  web.xml
    │
    ├─classes
    └─lib
일단은 웹 페이지를 톰캣 서버에서 구동시켜 웹 페이지가 로컬 서버에서 잘 실행되는지 확인해보자.
콘솔창에서 톰캣 서버 실행
설치한 톰캣 폴더 내 bin 폴더 내에는 startup.bat 이라는 파일이 존재한다. 이를 콘솔창에서 실행하면 톰캣 서버를 실행시킬 수 있다.
이를 위해 우선 해당 파일이 든 bin 폴더 경로를 환경 변수의 [path]에 등록시켜야 한다.
-
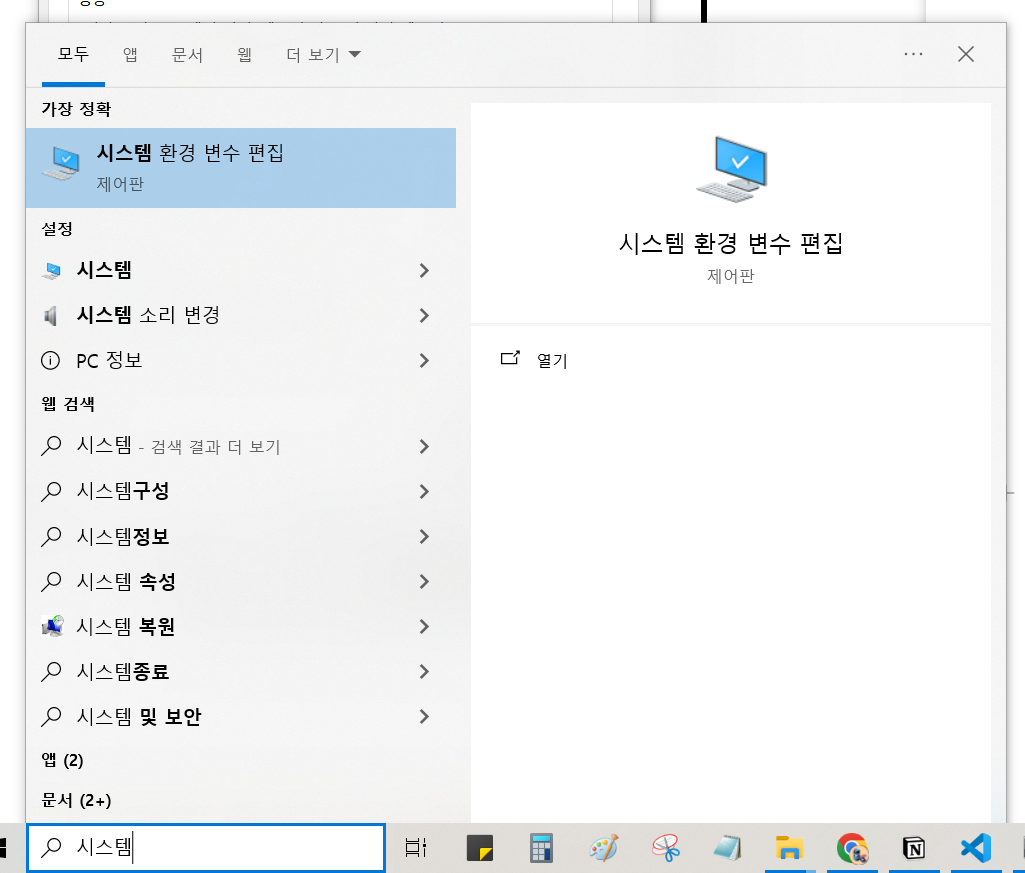
윈도우 10 기준 작업 표시줄에 있는 검색창에서 [시스템 환경 변수 편집] 검색 및 해당 아이콘 클릭.
- 새로 뜨는 [시스템 속성] 창에서 [고급] 탭 → [환경 변수(N)…] 버튼 클릭. 그러면 [환경 변수] 창이 새로 뜬다.
-
“사용자 변수”의 “Path” 더블클릭. 그러면 [환경 변수 편집] 창이 뜬다.
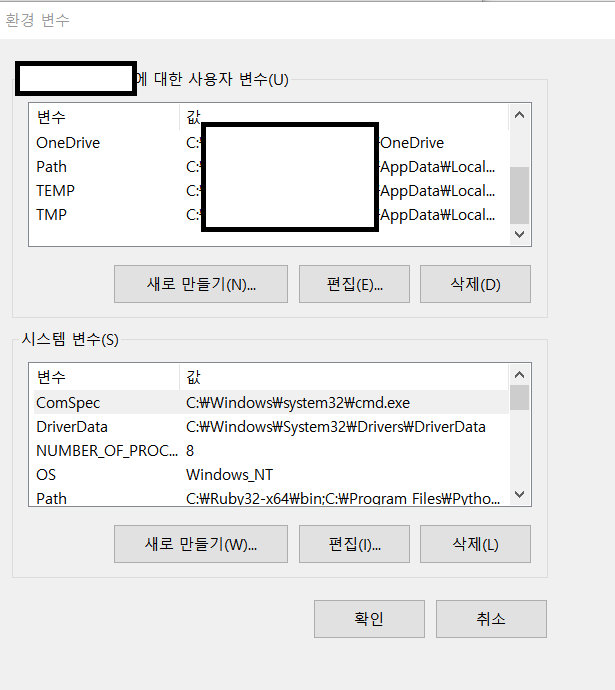
-
다음 사진과 같은 창에서 앞서 “startup.bat” 파일이 설치된 폴더인 bin 폴더의 절대 경로를 새로 입력해준다. “새로 만들기” 버튼을 누르고 경로를 입력하면 된다.

- 모든 창에서 “확인” 버튼을 누른다. 그 후, 이전에 존재하던 콘솔창은 끄고 새로 띄운다. 이래야 환경 변수 설정이 새로 반영될 수 있다.
-
현재 작업 위치를 웹 프로젝트 위치로 설정한 후, 다시 ‘startup’ 명령어를 입력해보자.
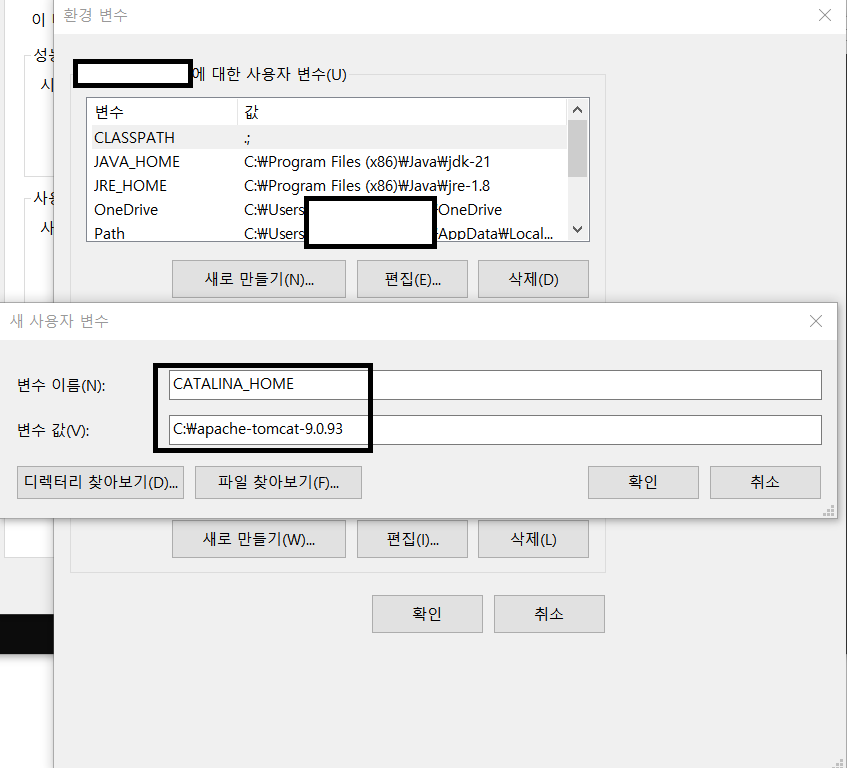
 MyFirstManualWebApp> startup
 The CATALINA_HOME environment variable is not defined correctly
 This environment variable is needed to run this program
그러면 위와 같은 메시지가 뜨면서 제대로 동작하질 않는다. 그 이유는 위 메시지를 보면 알 수 있듯, “CATALINA_HOME” 이라는 환경 변수도 설정해줘야 하기 때문이다. 이를 위해 다시 [환경 변수] 창을 띄운다.
-
[사용자 변수] 목록 아래의 [새로 만들기] 버튼을 누르면 아래 사진처럼 [새 사용자 변수] 창이 뜬다. 그 곳에 변수 이름은 앞서 콘솔창에 뜬 메시지 내 있던 이름 그대로 “CATALINA_HOME”이라 친다. [변수 값]에는 톰캣 폴더 위치를 지정해준다. 모든 창에서 “확인”을 누른 후, 새 콘솔창을 킨다.
-
다시 현재 작업 경로를 웹 프로젝트 경로로 설정한 후, 다시 ‘startup’이라 쳐보자. 그러면 콘솔창에는 아래와 같은 메시지가 뜨며…
 \MyFirstManualWebApp> startup
 Using CATALINA_BASE:   "C:\apache-tomcat-9.0.93"
 Using CATALINA_HOME:   "C:\apache-tomcat-9.0.93"
 Using CATALINA_TMPDIR: "C:\apache-tomcat-9.0.93\temp"
 Using JRE_HOME:        "C:\Program Files (x86)\Java\jdk-21"
 Using CLASSPATH:       "C:\apache-tomcat-9.0.93\bin\bootstrap.jar;C:\apache-tomcat-9.0.93\bin\tomcat-juli.jar"
 Using CATALINA_OPTS:
또한 새로운 창이 다음과 같이 뜬다.
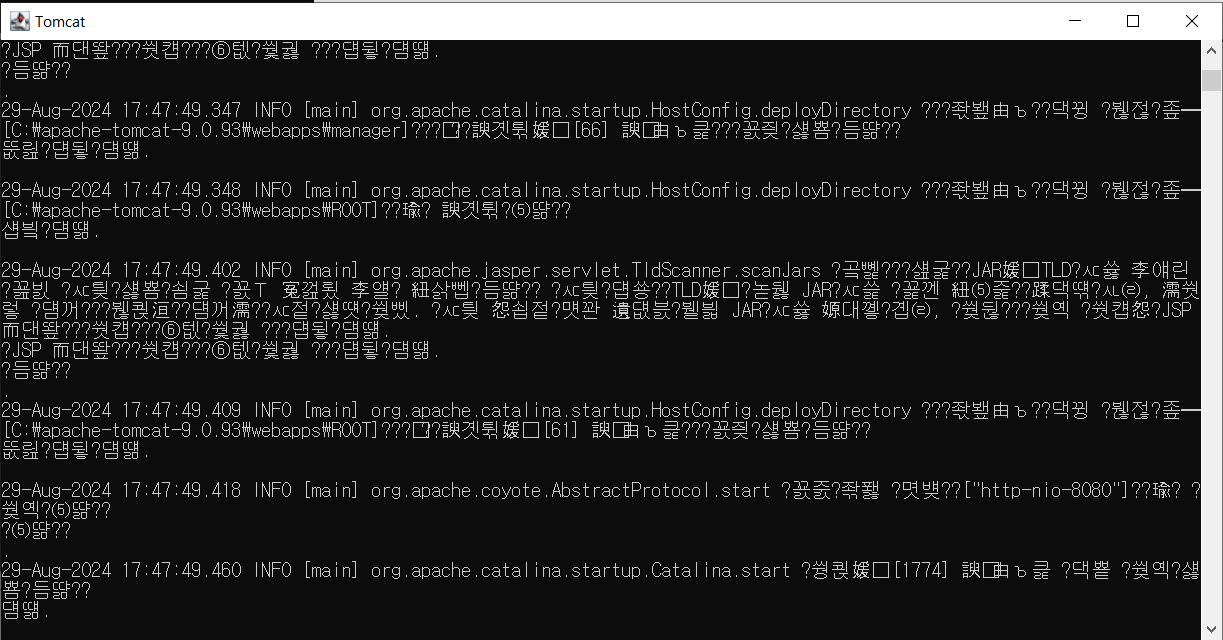
이 [Tomcat]이라는 창이 뜨면 톰캣 서버가 구동되고 있다는 뜻이다. 톰캣 서버를 실행시킬 때에는 해당 창을 절대 닫아선 안된다. 해당 창을 닫으면 서버도 닫히기 때문이다.
이제 브라우저 url 입력창에 다음과 같이 입력해보자.
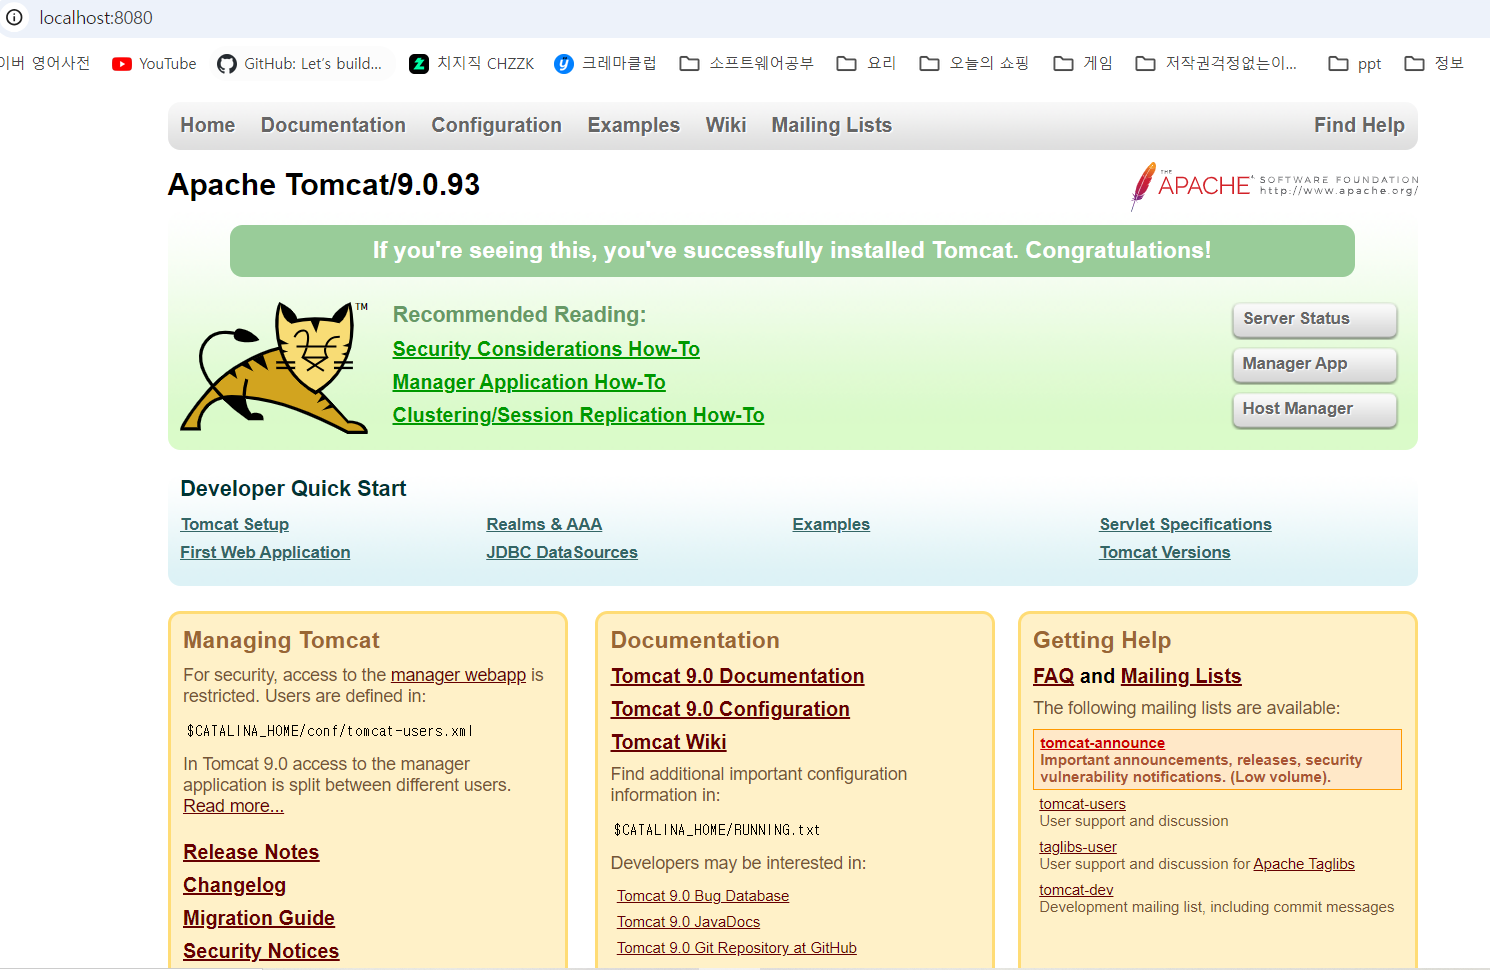
http://localhost:8080/
브라우저에서 다음의 창이 뜨면 성공적으로 톰캣 서버에 접속한 셈이다.
내 웹 프로젝트를 톰캣 서버에 등록하기
톰캣 서버의 구동은 확인하였다. 이제 현재 내 웹 프로젝트를 톰캣 서버에 등록하여 브라우저에 내 웹 페이지를 띄워보자.
웹 프로젝트 폴더 자체를 톰캣 폴더의 webapps 폴더 바로 아래에 위치시키면 바로 웹 페이지를 띄울 수 있다. 그러나 대부분의 경우, 개발 과정에서의 웹 프로젝트 폴더는 주로 다른 곳에 놓고 개발할 것이다. 이렇게 톰캣 폴더과 떨어진 상태에서도 내 웹 프로젝트 폴더를 연동하여 서버에 띄워볼 수 있는 방법이 있다.
톰캣 폴더의 conf폴더의 server.xml 파일을 vscode로 열어보자. 그러면 해당 파일 내용은 다음과 같이 있을 것이다.
<?xml version="1.0" encoding="UTF-8" ?>
<!--
Licensed to the Apache Software Foundation (ASF) under one or more
contributor license agreements. See the NOTICE file distributed with
this work for additional information regarding copyright ownership.
The ASF licenses this file to You under the Apache License, Version 2.0
(the "License"); you may not use this file except in compliance with
the License. You may obtain a copy of the License at
http://www.apache.org/licenses/LICENSE-2.0
Unless required by applicable law or agreed to in writing, software
distributed under the License is distributed on an "AS IS" BASIS,
WITHOUT WARRANTIES OR CONDITIONS OF ANY KIND, either express or implied.
See the License for the specific language governing permissions and
limitations under the License.
-->
<!-- Note: A "Server" is not itself a "Container", so you may not
define subcomponents such as "Valves" at this level.
Documentation at /docs/config/server.html
-->
<Server port="8005" shutdown="SHUTDOWN">
<Listener className="org.apache.catalina.startup.VersionLoggerListener" />
<!-- Security listener. Documentation at /docs/config/listeners.html
<Listener className="org.apache.catalina.security.SecurityListener" />
-->
<!-- APR connector and OpenSSL support using Tomcat Native -->
<Listener className="org.apache.catalina.core.AprLifecycleListener" />
<!-- OpenSSL support using FFM API from Java 22 -->
<!-- <Listener className="org.apache.catalina.core.OpenSSLLifecycleListener" /> -->
<!-- Prevent memory leaks due to use of particular java/javax APIs-->
<Listener
className="org.apache.catalina.core.JreMemoryLeakPreventionListener"
/>
<Listener
className="org.apache.catalina.mbeans.GlobalResourcesLifecycleListener"
/>
<Listener
className="org.apache.catalina.core.ThreadLocalLeakPreventionListener"
/>
<!-- Global JNDI resources
Documentation at /docs/jndi-resources-howto.html
-->
<GlobalNamingResources>
<!-- Editable user database that can also be used by
UserDatabaseRealm to authenticate users
-->
<Resource
name="UserDatabase"
auth="Container"
type="org.apache.catalina.UserDatabase"
description="User database that can be updated and saved"
factory="org.apache.catalina.users.MemoryUserDatabaseFactory"
pathname="conf/tomcat-users.xml"
/>
</GlobalNamingResources>
<!-- A "Service" is a collection of one or more "Connectors" that share
a single "Container" Note: A "Service" is not itself a "Container",
so you may not define subcomponents such as "Valves" at this level.
Documentation at /docs/config/service.html
-->
<Service name="Catalina">
<!--The connectors can use a shared executor, you can define one or more named thread pools-->
<!--
<Executor name="tomcatThreadPool" namePrefix="catalina-exec-"
maxThreads="150" minSpareThreads="4"/>
-->
<!-- A "Connector" represents an endpoint by which requests are received
and responses are returned. Documentation at :
Java HTTP Connector: /docs/config/http.html
Java AJP Connector: /docs/config/ajp.html
APR (HTTP/AJP) Connector: /docs/apr.html
Define a non-SSL/TLS HTTP/1.1 Connector on port 8080
-->
<Connector
port="8080"
protocol="HTTP/1.1"
connectionTimeout="20000"
redirectPort="8443"
maxParameterCount="1000"
/>
<!-- A "Connector" using the shared thread pool-->
<!--
<Connector executor="tomcatThreadPool"
port="8080" protocol="HTTP/1.1"
connectionTimeout="20000"
redirectPort="8443"
maxParameterCount="1000"
/>
-->
<!-- Define an SSL/TLS HTTP/1.1 Connector on port 8443
This connector uses the NIO implementation. The default
SSLImplementation will depend on the presence of the APR/native
library and the useOpenSSL attribute of the AprLifecycleListener.
Either JSSE or OpenSSL style configuration may be used regardless of
the SSLImplementation selected. JSSE style configuration is used below.
-->
<!--
<Connector port="8443" protocol="org.apache.coyote.http11.Http11NioProtocol"
maxThreads="150" SSLEnabled="true"
maxParameterCount="1000"
>
<SSLHostConfig>
<Certificate certificateKeystoreFile="conf/localhost-rsa.jks"
certificateKeystorePassword="changeit" type="RSA" />
</SSLHostConfig>
</Connector>
-->
<!-- Define an SSL/TLS HTTP/1.1 Connector on port 8443 with HTTP/2
This connector uses the APR/native implementation which always uses
OpenSSL for TLS.
Either JSSE or OpenSSL style configuration may be used. OpenSSL style
configuration is used below.
-->
<!--
<Connector port="8443" protocol="org.apache.coyote.http11.Http11AprProtocol"
maxThreads="150" SSLEnabled="true"
maxParameterCount="1000"
>
<UpgradeProtocol className="org.apache.coyote.http2.Http2Protocol" />
<SSLHostConfig>
<Certificate certificateKeyFile="conf/localhost-rsa-key.pem"
certificateFile="conf/localhost-rsa-cert.pem"
certificateChainFile="conf/localhost-rsa-chain.pem"
type="RSA" />
</SSLHostConfig>
</Connector>
-->
<!-- Define an AJP 1.3 Connector on port 8009 -->
<!--
<Connector protocol="AJP/1.3"
address="::1"
port="8009"
redirectPort="8443"
maxParameterCount="1000"
/>
-->
<!-- An Engine represents the entry point (within Catalina) that processes
every request. The Engine implementation for Tomcat stand alone
analyzes the HTTP headers included with the request, and passes them
on to the appropriate Host (virtual host).
Documentation at /docs/config/engine.html -->
<!-- You should set jvmRoute to support load-balancing via AJP ie :
<Engine name="Catalina" defaultHost="localhost" jvmRoute="jvm1">
-->
<Engine name="Catalina" defaultHost="localhost">
<!--For clustering, please take a look at documentation at:
/docs/cluster-howto.html (simple how to)
/docs/config/cluster.html (reference documentation) -->
<!--
<Cluster className="org.apache.catalina.ha.tcp.SimpleTcpCluster"/>
-->
<!-- Use the LockOutRealm to prevent attempts to guess user passwords
via a brute-force attack -->
<Realm className="org.apache.catalina.realm.LockOutRealm">
<!-- This Realm uses the UserDatabase configured in the global JNDI
resources under the key "UserDatabase". Any edits
that are performed against this UserDatabase are immediately
available for use by the Realm. -->
<Realm
className="org.apache.catalina.realm.UserDatabaseRealm"
resourceName="UserDatabase"
/>
</Realm>
<Host
name="localhost"
appBase="webapps"
unpackWARs="true"
autoDeploy="true"
>
<!-- SingleSignOn valve, share authentication between web applications
Documentation at: /docs/config/valve.html -->
<!--
<Valve className="org.apache.catalina.authenticator.SingleSignOn" />
-->
<!-- Access log processes all example.
Documentation at: /docs/config/valve.html
Note: The pattern used is equivalent to using pattern="common" -->
<Valve
className="org.apache.catalina.valves.AccessLogValve"
directory="logs"
prefix="localhost_access_log"
suffix=".txt"
pattern="%h %l %u %t "%r" %s %b"
/>
</Host>
</Engine>
</Service>
</Server>
server.xml
여기서 자신의 웹 프로젝트 폴더 경로를 설정해줄려면 <Host> 태그 내부에 다음과 같이 추가로 코드를 작성해야 한다.
<Host name="localhost" appBase="webapps" unpackWARs="true" autoDeploy="true">
<!-- SingleSignOn valve, share authentication between web applications
Documentation at: /docs/config/valve.html -->
<!--
<Valve className="org.apache.catalina.authenticator.SingleSignOn" />
-->
<!-- Access log processes all example.
Documentation at: /docs/config/valve.html
Note: The pattern used is equivalent to using pattern="common" -->
<Valve
className="org.apache.catalina.valves.AccessLogValve"
directory="logs"
prefix="localhost_access_log"
suffix=".txt"
pattern="%h %l %u %t "%r" %s %b"
/>
<!-- 내 웹 프로젝트 폴더 경로 및 url 경로 설정-->
<Context
path="/MyFirstManualWebApp"
docBase="C:\java\ManualWebApp\MyFirstManualWebApp"
/>
<!-- 설정 끝-->
</Host>
<Context> 태그의 속성값으로 위와 같이 설정해줄 수 있다.
- docBase : 서버에 등록하고자 하는 웹 프로젝트 폴더 경로.
- path : 브라우저 URL 경로에서, 포트번호 바로 뒤에 붙는 경로. 여기서는 웹 프로젝트명 그대로 설정하였다.
- 여기서 “/” 기호는 “http://localhost:8080/” 을 의미하며, 즉, 프로토콜-도메인-포트번호 까지를 의미한다. 위 설정의 경우 전체 경로는
http://localhost:8080/MyFirstManualWebApp가 되는 것이다.
- 여기서 “/” 기호는 “http://localhost:8080/” 을 의미하며, 즉, 프로토콜-도메인-포트번호 까지를 의미한다. 위 설정의 경우 전체 경로는
위와 같이 코드를 추가하였으면 저장 후, 서버를 재구동하자. server.xml은 보다시피 웹 앱 환경 설정 파일 중 하나이며, 내부 코드를 바꾸면 서버를 재시작해야 새로운 사항이 반영된다. [Tomcat] 창을 끈 후, 콘솔창에서 다시 ‘startup’ 명령어를 입력하면 된다.
이제 브라우저 URL 입력란에 http://localhost:8080/MyFirstManualWebApp/index.html
이라고 입력하면 다음의 웹 페이지가 보인다.
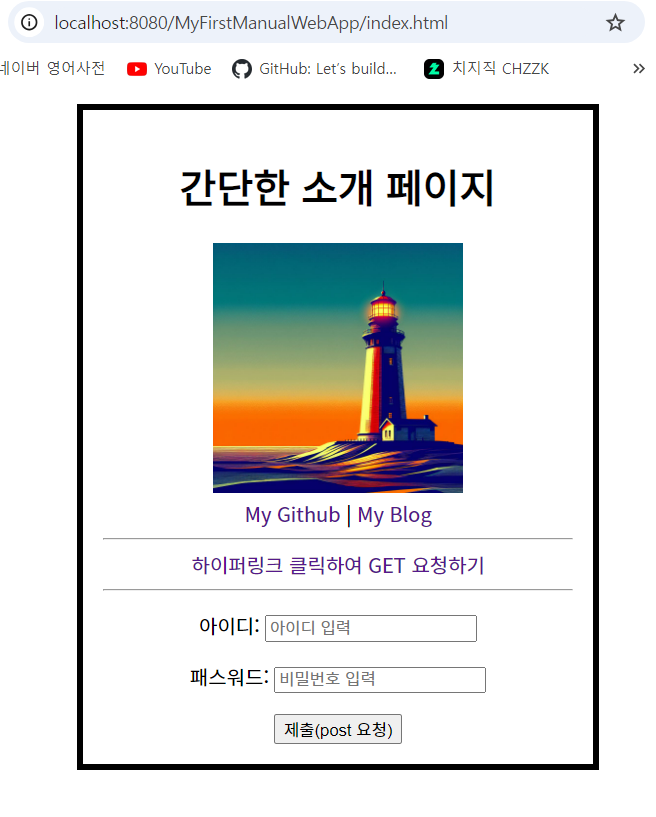
이로써, 자신의 웹 페이지를 성공적으로 로컬 서버에 띄우게 되었다. 실제 서버였다면 전세계 누구나 이 웹 페이지의 URL만 알면 해당 웹 페이지에 접속할 수 있게 되는 것이다. 여기서는 로컬 서버로 띄웠기에 전 세계 사람들이 볼 수는 없을 것이다.
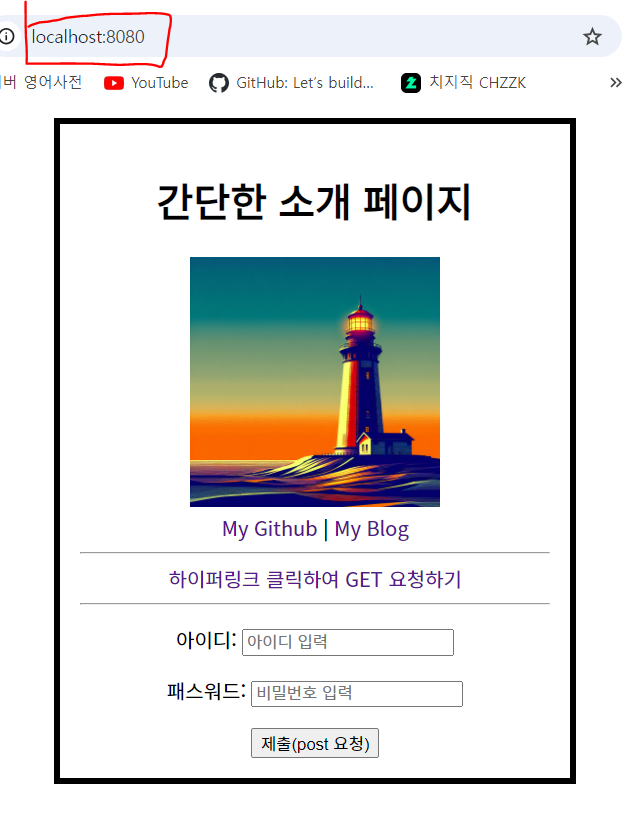
참고로, 위 주소가 너무 길다면, 앞서 본 server.xml 파일의 Context 태그의 path 경로를 마음대로 바꾸면 된다. 참고로 path="/" 와 같이 슬래시만 남겨두면 아예 웹 프로젝트 이름을 생략하고 들어갈 수 있게 된다.
또한, 파일 이름이 정확히 index.html 인 경우 예외적으로 해당 파일 이름을 생략해도 해당 페이지로 이동할 수 있다. 그래서 다음과 같이 URL을 입력해도 앞선 페이지로 이동할 수 있는 것이다.
서블릿 작성 및 요청 처리 확인하기
이번에는 사용자의 요청 처리를 할 수 있게끔 서블릿을 도입해보자. 앞선 웹 프로젝트 폴더에서, 자바 소스 파일(.java)만 따로 모아 저장할 폴더를 만들자. 여기서는 src라고 이름 붙였다. 그 후, 해당 파일 아래에 ‘MyServlet.java’라는 파일을 만들었다.
그러면 웹 폴더는 다음의 구조를 가질 것이다.
root/
│  index.html
│  style.css
│
├─images
│      lighthouse.jpg
│
├─src
│      MyServlet.java
│
└─WEB-INF
    │  web.xml
    │
    ├─classes
    └─lib
servlet api 공식 문서
본격적인 작업에 앞서, 서블릿 관련 API 공식 사이트를 찾아 도움을 받으면 좋을 것이다. 다음은 톰캣 홈페이지에서 제공하는 Java EE 공식 문서이다.
Java(TM) EE 8 Specification APIs
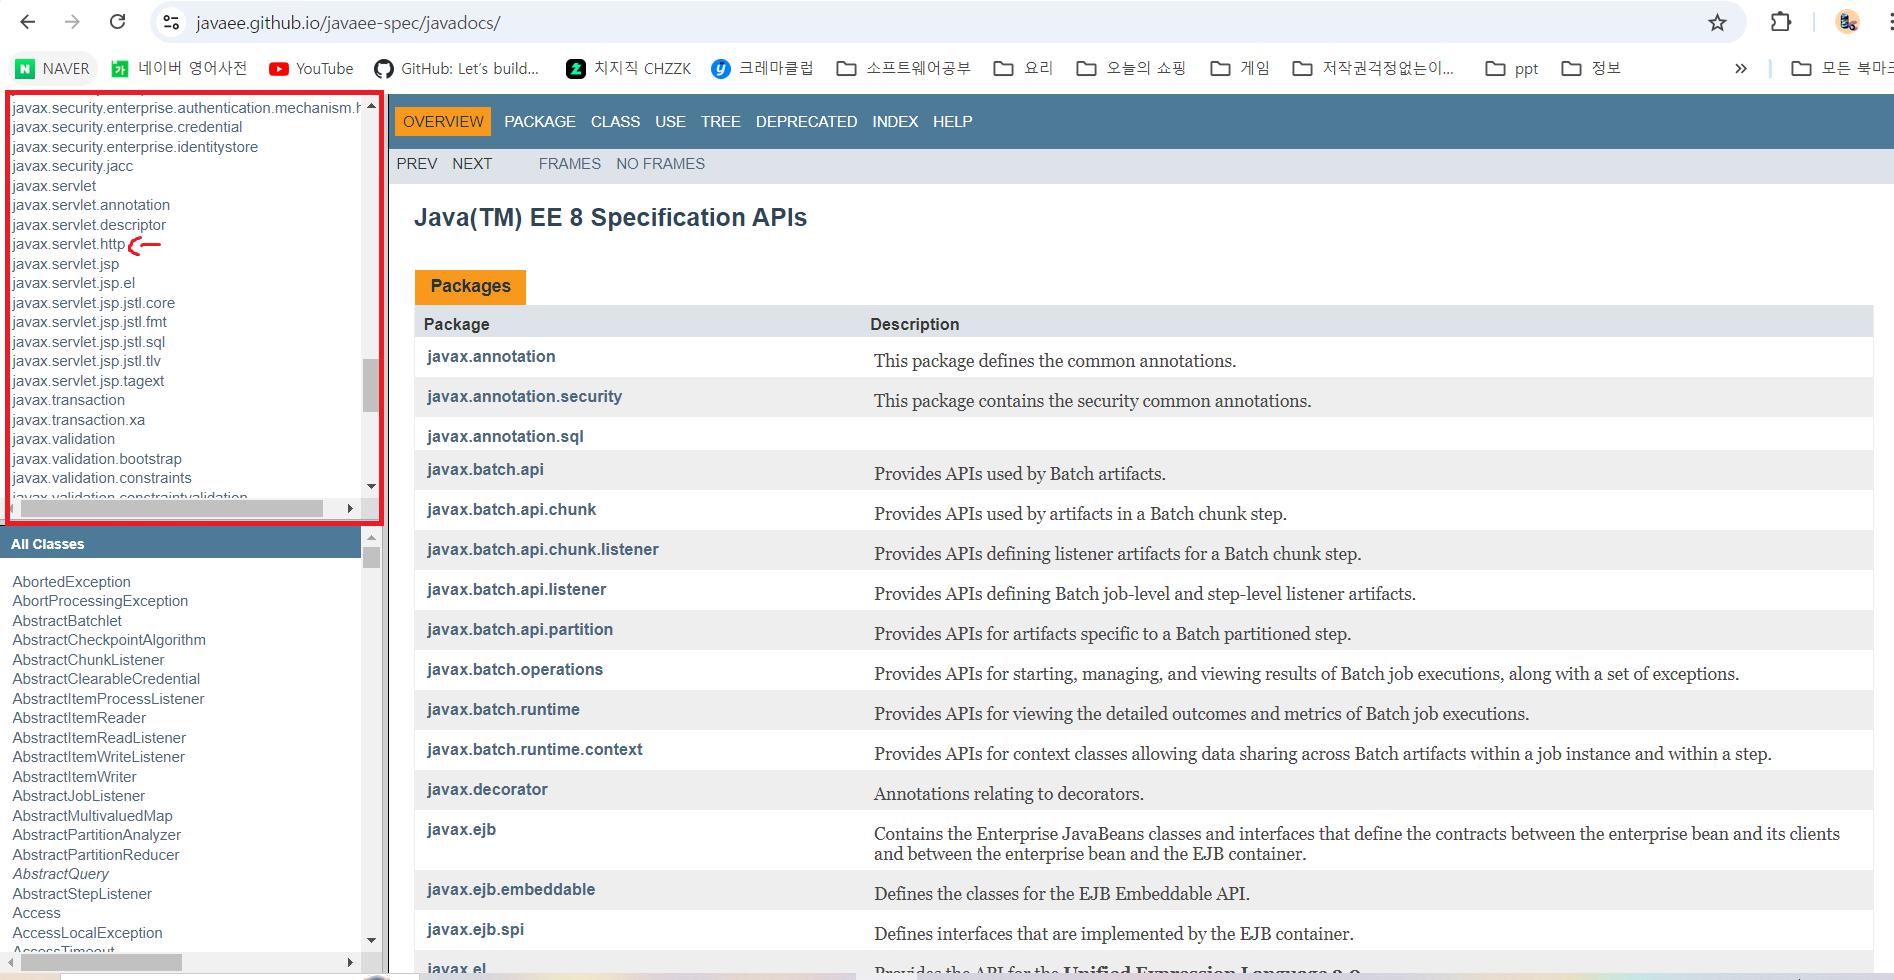
위와 같이 첫 화면이 뜬다.
서블릿 클래스 작성 시 필요한 패키지는 왼쪽 위 목록에서 javax.servlet.http 를 클릭하면 살펴볼 수 있다. 클릭 시 바로 아래 목록에서 여러 인터페이스 및 클래스 목록이 뜨는데, 그 중 서블릿 작성 시 상속해서 사용해야 하는 HttpServlet 클래스가 나온다. 이를 클릭하면 자세한 설명과 함께 사용할 수 있는 모든 메서드 등의 모든 정보가 나온다.
서블릿 api 가져오기
이클립스에서 작성하는 것이 아닌 수작업으로 할 것이라서, 현재 웹 프로젝트 폴더 내에는 서블릿 api가 담긴 jar 파일이 없다. Java SE라는 표준과는 달리, Java EE에 속하는 서블릿을 사용하려면 별도의 jar 파일을 다운로드 받아 사용해야 한다.
다행히도, 톰캣 폴더 내에 서블릿 api를 제공하는 jar 파일이 있다. 해당 파일을 복사하여 가져오자.
톰캣 폴더 내 lib 폴더 내부에는 “servlet.api.jar” 파일이 있다. 이를 복사하여 웹 프로젝트 폴더 내 WEB-INF/lib 폴더에 붙여넣자.
root
│  index.html
│  style.css
│
├─images
│      lighthouse.jpg
│
├─src
│      MyServlet.java
│
└─WEB-INF
    │  web.xml
    │
    ├─classes
    └─lib
            servlet-api.jar
이제 이 jar 파일 덕분에 서블릿 api를 제공받아 사용할 수 있게 되었다.
서블릿 코드 작성하기
앞서 만든 MyServlet.java 파일 내부에 다음과 같이 소스코드를 작성하였다.
import javax.servlet.http.HttpServlet;
import javax.servlet.http.HttpServletRequest;
import javax.servlet.http.HttpServletResponse;
import javax.servlet.ServletException;
import java.io.IOException;
import java.io.PrintWriter;

public class MyServlet extends HttpServlet {

    @Override
    /**
     * Get 요청 처리하는 메서드
     * @param req
     * @param resp
     * @throws ServletException
     * @throws IOException
     */
    protected void doGet(HttpServletRequest req, HttpServletResponse resp)
              throws ServletException, IOException {
        PrintWriter out = resp.getWriter();  // 클라이언트에게 메시지 출력(응답 전송)
        //out.println("<html><body><h2>Your GET request has been responsed by   </h2></body></html>");
        out.println("""
                <html>
                <body>
                <h1>
                Your GET request has been responsed by the server.
                </h1>
                <h2>
                This page and message are the response transmitted from the server.
                </h2>
                </body>
                </html>
                """);
        out.close();
    }

    /**
     * Post 요청 처리 메서드.
     * @param req
     * @param resp
     * @throws ServletException
     * @throws IOException
     */
    protected void doPost(HttpServletRequest req, HttpServletResponse resp)
              throws ServletException, IOException {
        PrintWriter out = resp.getWriter();  // 클라이언트에게 메시지 출력(응답 전송)
        //out.println("<html><body><h2>POST 요청 처리 완료. 이 페이지는 해당 요청에 대한 응답입니다.  </h2></body></html>");
        out.println("""
                <html>
                <body>
                <h1>
                Your POST request has been responsed by the server.
                </h1>
                <h2>
                This page and message are the response transmitted from the server.
                </h2>
                </body>
                </html>
                """);
        out.close();
    }
}
Get 요청과 Post 요청을 처리할 doGet(), doPost 메서드를 오버라이딩하였다.
참고로, 응답 페이지에 보일 메시지는 현재 한글로 치면 깨져서 나오므로 여기서는 영어로 작성하였다.
이제 해당 파일을 컴파일해야 한다. 이 때, 컴파일하고 나온 클래스 파일은 반드시 WEB-INF/classes 폴더에 위치하도록 해야 한다.
콘솔창에서 루트 디렉토리 위치에서 다음의 명령어를 입력하여 컴파일을 하였다.
\MyFirstManualWebApp> javac -cp WEB-INF/lib/* -d WEB-INF/classes src/MyServlet.java
root
│  index.html
│  style.css
│
├─images
│      lighthouse.jpg
│
├─src
│      MyServlet.java
│
└─WEB-INF
    │  web.xml
    │
    ├─classes
    │      MyServlet.class
    │
    └─lib
            servlet-api.jar
servlet-api.jar 까지 포함시켜 컴파일하는 것을 잊지말자!
생성된 클래스 파일은 나중에 톰캣 서버에서 실행하는 것이기에 개발자가 직접 실행할 이유가 없다. 만약 직접 실행해보면 다음의 에러 메시지를 볼 것이다.
\MyFirstManualWebApp\WEB-INF\classes> java MyServlet
Error: Could not find or load main class MyServlet
Caused by: java.lang.NoClassDefFoundError: javax/servlet/http/HttpServlet
해당 코드에 main 메서드가 없어 어차피 실행되지 않는다.
작성한 서블릿을 web.xml에 등록하기
이제 앞서 작성한 서블릿 클래스 정보를 web.xml 파일에 등록해야 한다. 앞서 복사해온 웹 프로젝트 폴더 내 WEB-INF 폴더 내 web.xml 파일을 vscode에서 열어본다.
<?xml version="1.0" encoding="UTF-8"?>
<!--
 Licensed to the Apache Software Foundation (ASF) under one or more
  contributor license agreements.  See the NOTICE file distributed with
  this work for additional information regarding copyright ownership.
  The ASF licenses this file to You under the Apache License, Version 2.0
  (the "License"); you may not use this file except in compliance with
  the License.  You may obtain a copy of the License at

      http://www.apache.org/licenses/LICENSE-2.0

  Unless required by applicable law or agreed to in writing, software
  distributed under the License is distributed on an "AS IS" BASIS,
  WITHOUT WARRANTIES OR CONDITIONS OF ANY KIND, either express or implied.
  See the License for the specific language governing permissions and
  limitations under the License.
-->
<web-app xmlns="http://xmlns.jcp.org/xml/ns/javaee"
  xmlns:xsi="http://www.w3.org/2001/XMLSchema-instance"
  xsi:schemaLocation="http://xmlns.jcp.org/xml/ns/javaee
                      http://xmlns.jcp.org/xml/ns/javaee/web-app_4_0.xsd"
  version="4.0"
  metadata-complete="true">

  <display-name>Welcome to Tomcat</display-name>
  <description>
     Welcome to Tomcat
  </description>

</web-app>
web.xml
이전에 [Servlet] 웹앱 구조와 Servlet의 Life Cycle 의 “web.xml과 서블릿 설정” 챕터에서 보았던 태그들을 이용하여 앞서 작성했던 서블릿 클래스를 등록한다. 다음과 같이 코드를 추가하였다.
<?xml version="1.0" encoding="UTF-8"?>
<!--
 Licensed to the Apache Software Foundation (ASF) under one or more
  contributor license agreements.  See the NOTICE file distributed with
  this work for additional information regarding copyright ownership.
  The ASF licenses this file to You under the Apache License, Version 2.0
  (the "License"); you may not use this file except in compliance with
  the License.  You may obtain a copy of the License at

      http://www.apache.org/licenses/LICENSE-2.0

  Unless required by applicable law or agreed to in writing, software
  distributed under the License is distributed on an "AS IS" BASIS,
  WITHOUT WARRANTIES OR CONDITIONS OF ANY KIND, either express or implied.
  See the License for the specific language governing permissions and
  limitations under the License.
-->
<web-app xmlns="http://xmlns.jcp.org/xml/ns/javaee"
  xmlns:xsi="http://www.w3.org/2001/XMLSchema-instance"
  xsi:schemaLocation="http://xmlns.jcp.org/xml/ns/javaee
                      http://xmlns.jcp.org/xml/ns/javaee/web-app_4_0.xsd"
  version="4.0"
  metadata-complete="true">

  <display-name>Welcome to Tomcat</display-name>
  <description>
     Welcome to Tomcat
  </description>

  <!-- 서블릿 설정 추가 -->
  <servlet>
    <servlet-name>loginServlet</servlet-name>
    <servlet-class>MyServlet</servlet-class>
  </servlet>
  <servlet-mapping>
    <servlet-name>loginServlet</servlet-name>
    <url-pattern>/login.do</url-pattern>
  </servlet-mapping>

  <!-- 서블릿 설정 추가 끝 -->

</web-app>
web.xml
해당 파일을 저장한다. 아직 index.html 파일에는 이 서블릿과 매핑하지 않았다. 해당 파일을 다시 켜 다음과 같이 코드를 추가한다.
<!DOCTYPE html>
<html lang="ko">
<head>
<meta charset="UTF-8">
<meta http-equiv="X-UA-Compatible" content="IE=edge">
<meta name="viewport" content="width=device-width, initial-scale=1.0">
<title>제 홈페이지입니다.</title>
<link rel="stylesheet" href="style.css" />
</head>
<body>
<div id="container">
<h1>간단한 소개 페이지</h1>
<img src="images/lighthouse.jpg" width="200em"/>
<div class="mys">
<a href="https://github.com/JeroCaller" target="_blank">My Github</a>
<span>|</span>
<a href="https://jerocaller.github.io/" target="_blank">My Blog</a>
</div>
<hr/>
<div>
<!-- 서블릿 매핑 -->
<a href="login.do">하이퍼링크 클릭하여 GET 요청하기</a>
</div>
<hr/>
<div class="form-area">
<!--
action에는 web.xml 파일의
<servlet-mapping> 내 <url-pattern> 태그에 등록된
이름을 그대로 가져다 쓰면 된다.
-->
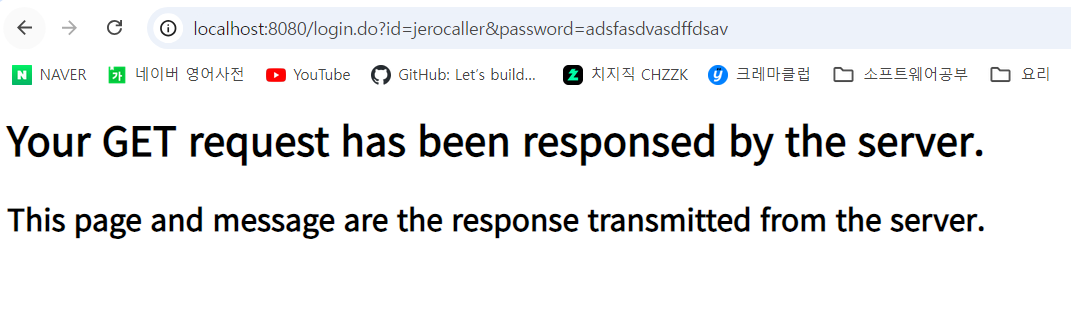
<form action="login.do" method="get">
<label for="id">아이디: <input type="text" placeholder="아이디 입력" name="id"/> </label>
<label for="password">패스워드: <input type="password" placeholder="비밀번호 입력" name="password"></label>
<input type="submit" value="제출(post 요청)" />
</form>
</div>
</div>
</body>
</html>
저장한다.
web.xml 파일을 수정한 경우, 톰캣 서버를 재구동해야 한다. 이제 톰캣 서버를 재구동하여 브라우저에서 일단 index.html 페이지가 잘 뜨는지 확인하자. 필자의 경우 잘 뜨는 것을 확인하였다.
이제 “하이퍼링크 클릭하여 GET 요청하기”를 눌러보자. 그러면 다음의 페이지가 보일 것이다.

앞서 doGet 메서드 내부에 작성한 HTML 코드가 잘 보이는 것을 확인할 수 있다. 이로서 사용자의 요청을 서블릿이 잘 처리하는 것을 확인하였다.
이번에는 다시 뒤로 돌아가서, 아이디와 패스워드를 아무렇게나 입력하고 “제출(post 요청)” 을 눌러보자. 그러면 다음과 같이 url창에 아이디와 비밀번호로 입력한 데이터가 그대로 보이는 것을 확인할 수 있다.
이번엔 index.html의 form 태그 내 method를 post로 바꾸고, 브라우저에서 새로고침한 뒤 다시 아이디와 패스워드 입력 후 “제출” 버튼을 눌러보자.
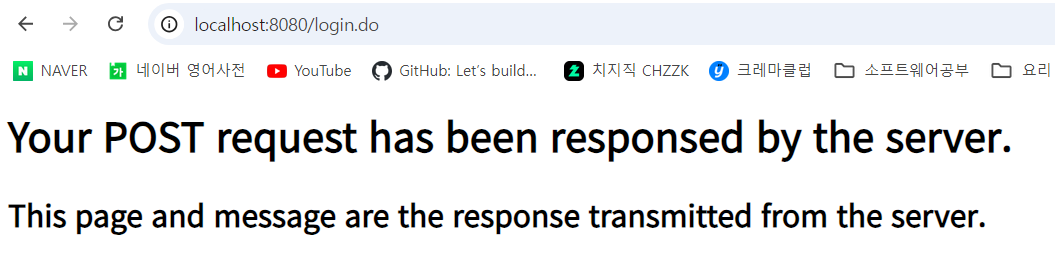
위 사진에서 알 수 있듯, 이번에는 url창에 앞서 입력한 사용자의 데이터가 보이지 않는 것을 알 수 있다. get 방식보다는 post 방식이 상대적으로 더 보안성이 있다는 것을 알 수 있다.
웹 프로젝트 패키징하여 배포 연습해보기
이제 만든 웹 프로젝트 폴더를 웹에 배포하는 연습을 해보자.
웹 폴더를 WAR 파일로 압축하기
실습 전에 server.xml 파일의 Context 태그 내 path 속성값을 “/mylogin” 으로 대체하여 저장하였다. 이는 http://localhost:8080/ 으로 접속 시 톰캣에서 제공하는 화면에 접속하기 위함이다.
그런데 사실, 실제 웹을 서버에 배포할 때에는 server.xml 파일에 개발자가 직접 접근하여 설정할 수 없다고 한다. 따라서 Context 태그를 주석 처리하여 저장해보았다. 보다 실제적인 실습을 위해서이다.
이 상태에서 톰캣 서버를 재구동하고, http://localhost:8080/mylogin 으로 접속하면 ‘404 not found’ 에러가 발생하여 해당 웹페이지가 안 보이는 상태가 된다. 이제 server.xml 파일을 직접 조작하지 않아도 웹을 배포할 수 있도록 해보겠다.
웹 프로젝트 폴더는 WAR(Web ARchive) 확장자로 압축한다. 이 확장자도 jar로 압축한다. jar 파일과 압축 과정에 대한 자세한 사항은 열심히 만든 자바 프로젝트를 jar로 패키징하기 페이지를 참조.
콘솔창에서 현재 작업 중인 웹 프로젝트 폴더 경로로 이동한 후, 다음의 명령어를 통해 해당 웹 프로젝트 폴더를 상위 폴더에 war 파일로 압축, 저장한다.
MyFirstManualWebApp> jar -cvf ../mypage.war .
added manifest
adding: WEB-INF/(in = 0) (out= 0)(stored 0%)
adding: WEB-INF/classes/(in = 0) (out= 0)(stored 0%)
adding: WEB-INF/classes/MyServlet.class(in = 1076) (out= 522)(deflated 51%)
adding: WEB-INF/lib/(in = 0) (out= 0)(stored 0%)
adding: WEB-INF/lib/servlet-api.jar(in = 285625) (out= 267827)(deflated 6%)
adding: WEB-INF/web.xml(in = 1589) (out= 792)(deflated 50%)
adding: images/(in = 0) (out= 0)(stored 0%)
adding: images/lighthouse.jpg(in = 132071) (out= 123985)(deflated 6%)
adding: index.html(in = 1562) (out= 808)(deflated 48%)
adding: src/(in = 0) (out= 0)(stored 0%)
adding: src/MyServlet.java(in = 2176) (out= 585)(deflated 73%)
adding: style.css(in = 266) (out= 161)(deflated 39%)
C:\java\ManualWebApp\MyFirstManualWebApp> cd ../

C:\java\ManualWebApp> tree /f
폴더 PATH의 목록입니다.
볼륨 일련 번호는 C237-F43B입니다.
C:.
│  mypage.war
│
└─MyFirstManualWebApp
    │  index.html
    │  style.css
    │
    ├─images
    │      lighthouse.jpg
    │
    ├─src
    │      MyServlet.java
    │
    └─WEB-INF
        │  web.xml
        │
        ├─classes
        │      MyServlet.class
        │
        └─lib
                servlet-api.jar
톰캣 서버 관리 및 웹 배포
다시 브라우저로 돌아가, 톰캣 서버가 구동되는 상황에서 http://localhost:8080 을 입력하여 다음과 같이 톰캣 화면이 뜨도록 하자.
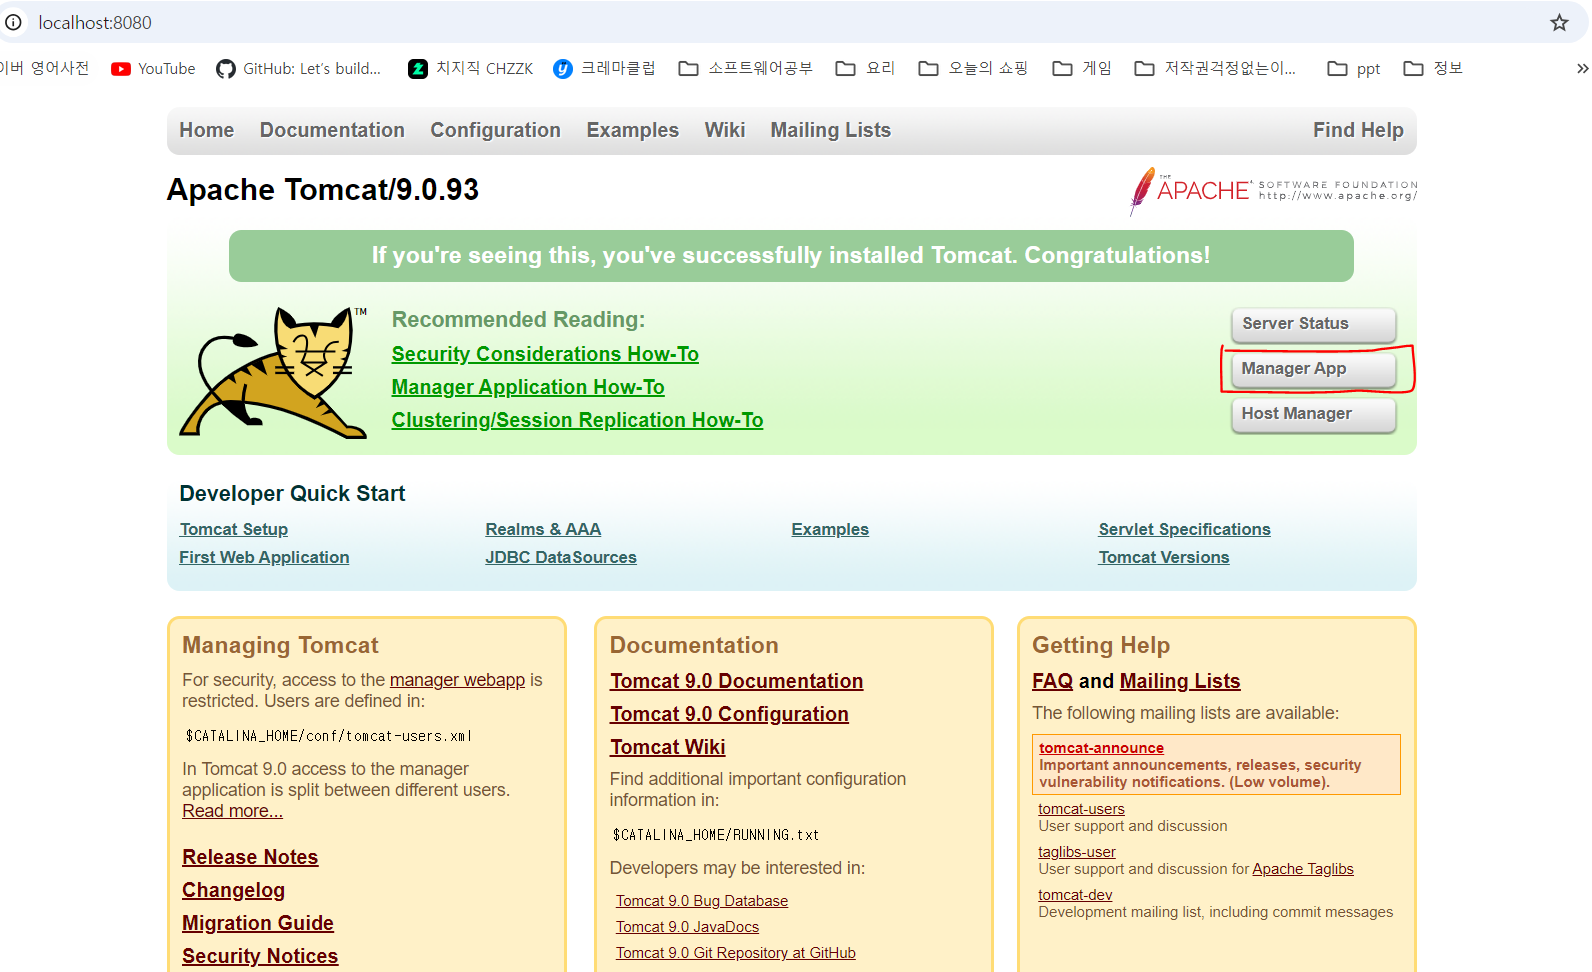
위 사진에서 보이는 “Manager App” 버튼을 클릭하면 다음의 페이지로 이동한다.
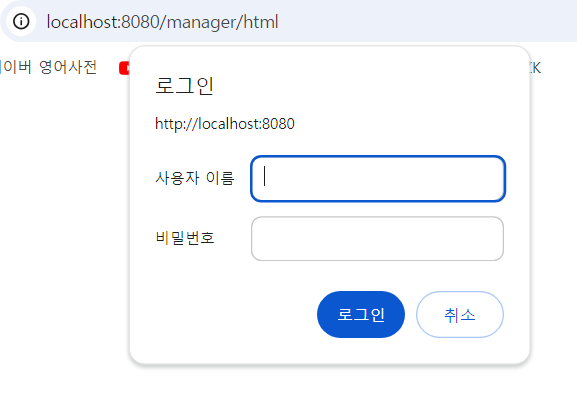
여기선 아직 사용자 이름이나 비밀번호를 설정한 게 없기에 “취소” 버튼을 누른다. 그러면 다음의 에러 메시지가 뜬다.
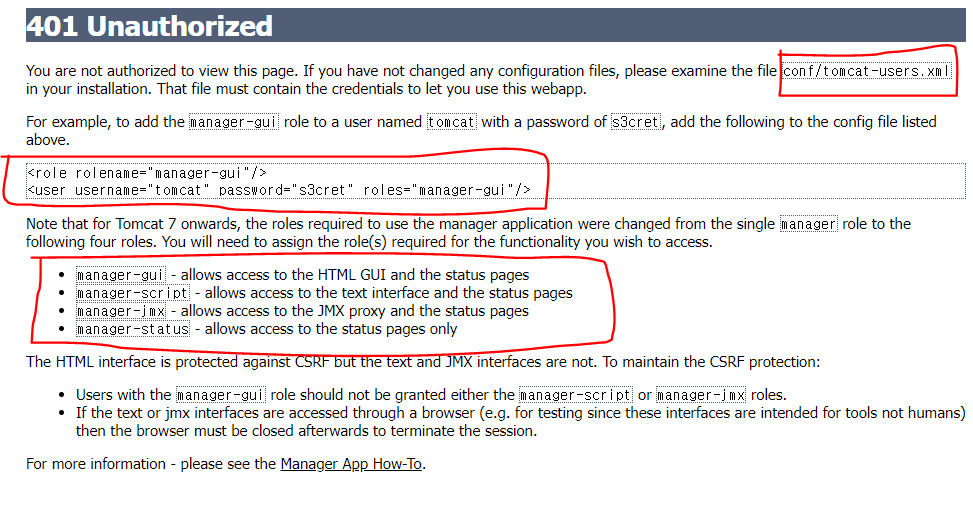
권한이 없어 관리자 페이지에 들어갈 수 없는 것이다. 그런데 위 에러 메시지를 자세히 살펴보면 다음의 사실을 알 수 있다.
- conf/tomcat-users.xml 파일에 들어가 사용자 이름과 패스워드를 등록해야 한다.
- 등록 시 위 사진의 2번째 빨간 상자와 같은 양식으로 등록한다.
<role rolename="manager-gui"/>
<user username="tomcat" password="s3cret" roles="manager-gui"/>
- roles 속성에는 위 사진의 3번째 빨간 상자 내부와 같이 정해진 값들 중 하나를 넣을 수 있다. (여기서는 그냥 manager-gui를 넣을 예정)
그러면 위 사진의 설명에 따라 톰캣 폴더의 conf 폴더 내 tomcat-users.xml 파일을 열어보자. 그러면 다음의 내용들로 구성되어 있을 것이다.
<?xml version="1.0" encoding="UTF-8"?>
<!--
  Licensed to the Apache Software Foundation (ASF) under one or more
  contributor license agreements.  See the NOTICE file distributed with
  this work for additional information regarding copyright ownership.
  The ASF licenses this file to You under the Apache License, Version 2.0
  (the "License"); you may not use this file except in compliance with
  the License.  You may obtain a copy of the License at

      http://www.apache.org/licenses/LICENSE-2.0

  Unless required by applicable law or agreed to in writing, software
  distributed under the License is distributed on an "AS IS" BASIS,
  WITHOUT WARRANTIES OR CONDITIONS OF ANY KIND, either express or implied.
  See the License for the specific language governing permissions and
  limitations under the License.
-->
<tomcat-users xmlns="http://tomcat.apache.org/xml"
              xmlns:xsi="http://www.w3.org/2001/XMLSchema-instance"
              xsi:schemaLocation="http://tomcat.apache.org/xml tomcat-users.xsd"
              version="1.0">
<!--
  By default, no user is included in the "manager-gui" role required
  to operate the "/manager/html" web application.  If you wish to use this app,
  you must define such a user - the username and password are arbitrary.

  Built-in Tomcat manager roles:
    - manager-gui    - allows access to the HTML GUI and the status pages
    - manager-script - allows access to the HTTP API and the status pages
    - manager-jmx    - allows access to the JMX proxy and the status pages
    - manager-status - allows access to the status pages only

  The users below are wrapped in a comment and are therefore ignored. If you
  wish to configure one or more of these users for use with the manager web
  application, do not forget to remove the <!.. ..> that surrounds them. You
  will also need to set the passwords to something appropriate.
-->
<!--
  <user username="admin" password="<must-be-changed>" roles="manager-gui"/>
  <user username="robot" password="<must-be-changed>" roles="manager-script"/>
-->
<!--
  The sample user and role entries below are intended for use with the
  examples web application. They are wrapped in a comment and thus are ignored
  when reading this file. If you wish to configure these users for use with the
  examples web application, do not forget to remove the <!.. ..> that surrounds
  them. You will also need to set the passwords to something appropriate.
-->
<!--
  <role rolename="tomcat"/>
  <role rolename="role1"/>
  <user username="tomcat" password="<must-be-changed>" roles="tomcat"/>
  <user username="both" password="<must-be-changed>" roles="tomcat,role1"/>
  <user username="role1" password="<must-be-changed>" roles="role1"/>
-->
</tomcat-users>
tomcat-users.xml
위 내용 중 마지막 </tomcat-users> 태그 바로 앞에 다음의 코드를 추가하였다.
<role rolename="manager-gui"/>
<user username="my-tomcat" password="1111" roles="manager-gui"/>
해당 파일 저장 → 서버 재구동 → “manager app”으로 다시 간다. 그리고 다시 뜨는 로그인 창에서 앞서 설정한 username의 값을 “사용자 이름”에, 비밀번호에는 “password” 속성값을 입력하면 된다. 로그인에 성공하면 다음의 창이 뜬다.
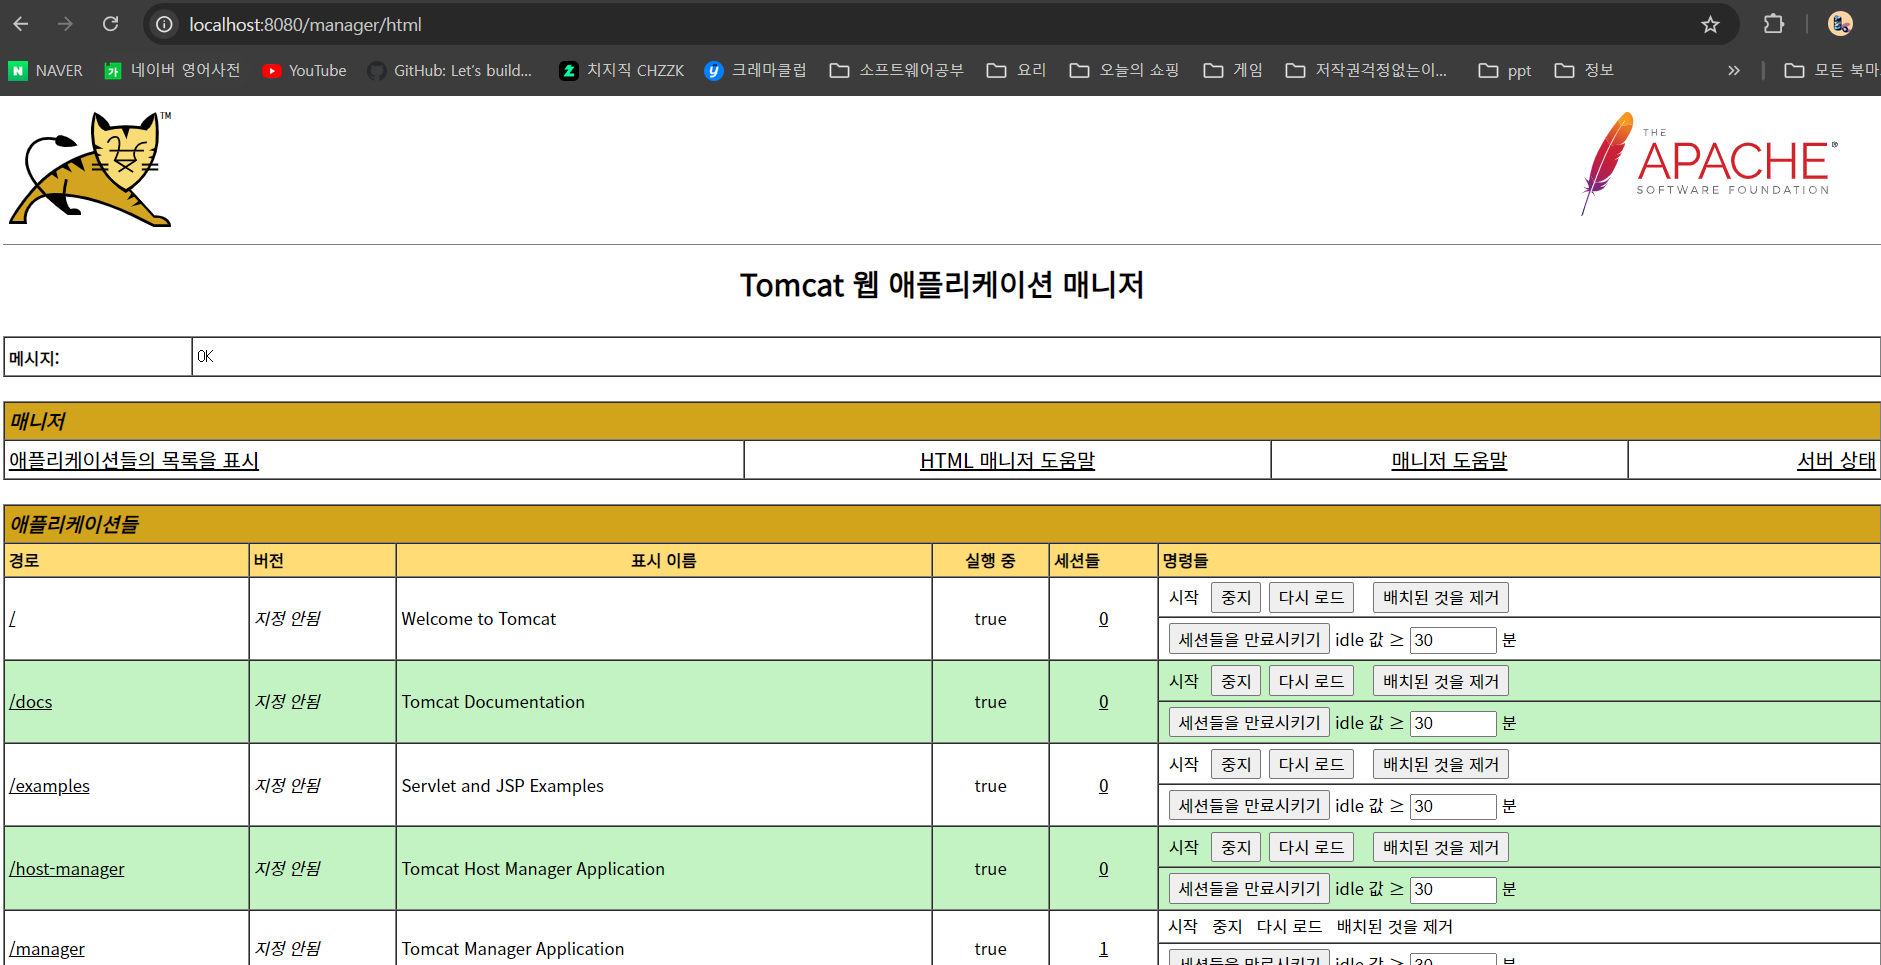
아래로 스크롤 내리면 다음과 같이 WAR 파일을 배치하는 곳이 있다. 이곳에 앞서 생성한 WAR 파일을 선택한 후 배치하자.

그러면 다시 스크롤을 올리면 [애플리케이션들] 목록에 앞서 등록한 war파일이 경로로 표시된다.
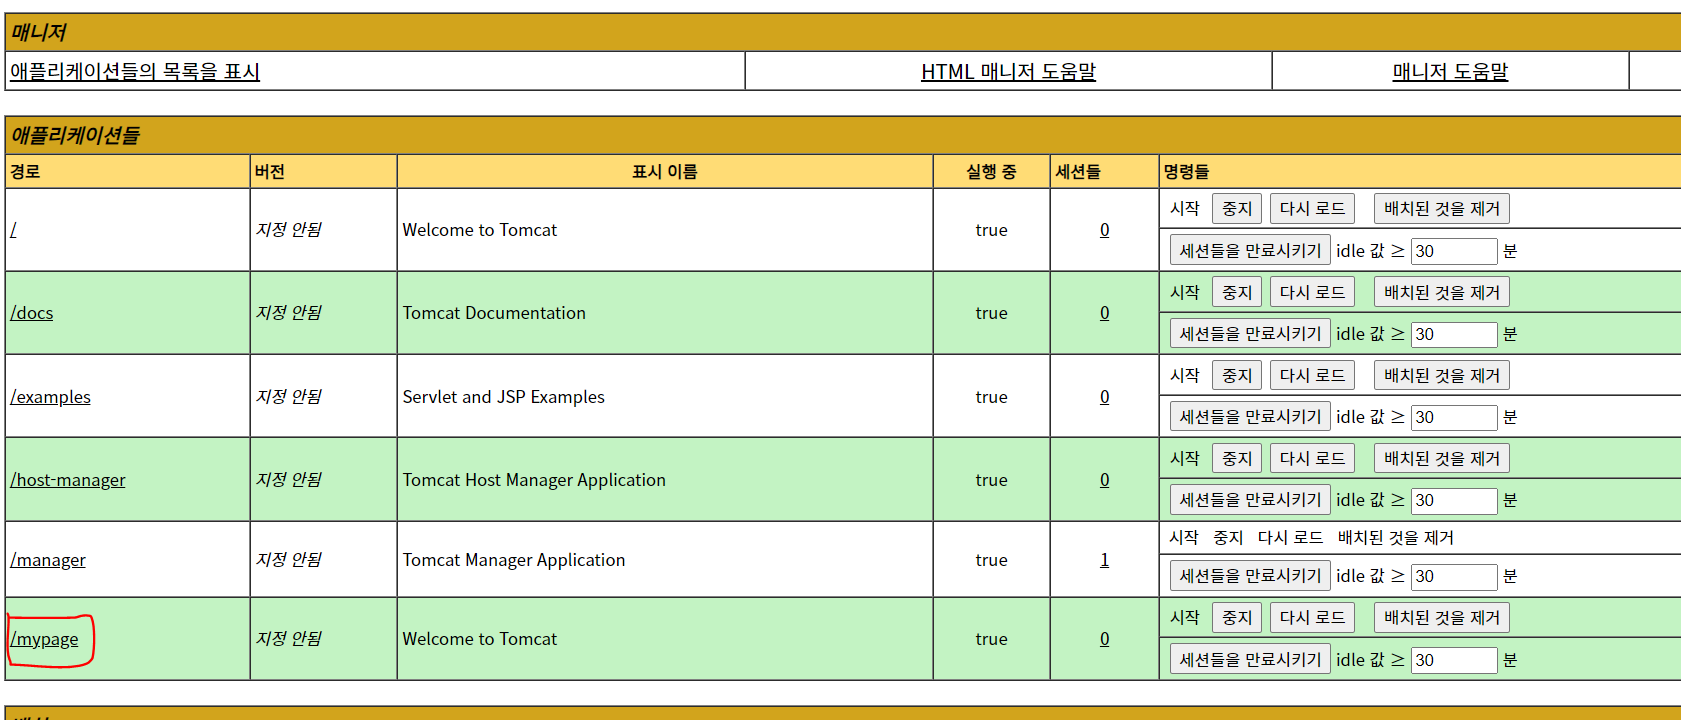
이제 해당 경로로 이동하면 웹 사이트를 볼 수 있다. 즉, 웹 배포가 완료된 것이다. ‘http://localhost:8080/mypage’ 로 이동하면 다음의 화면을 볼 수 있다.
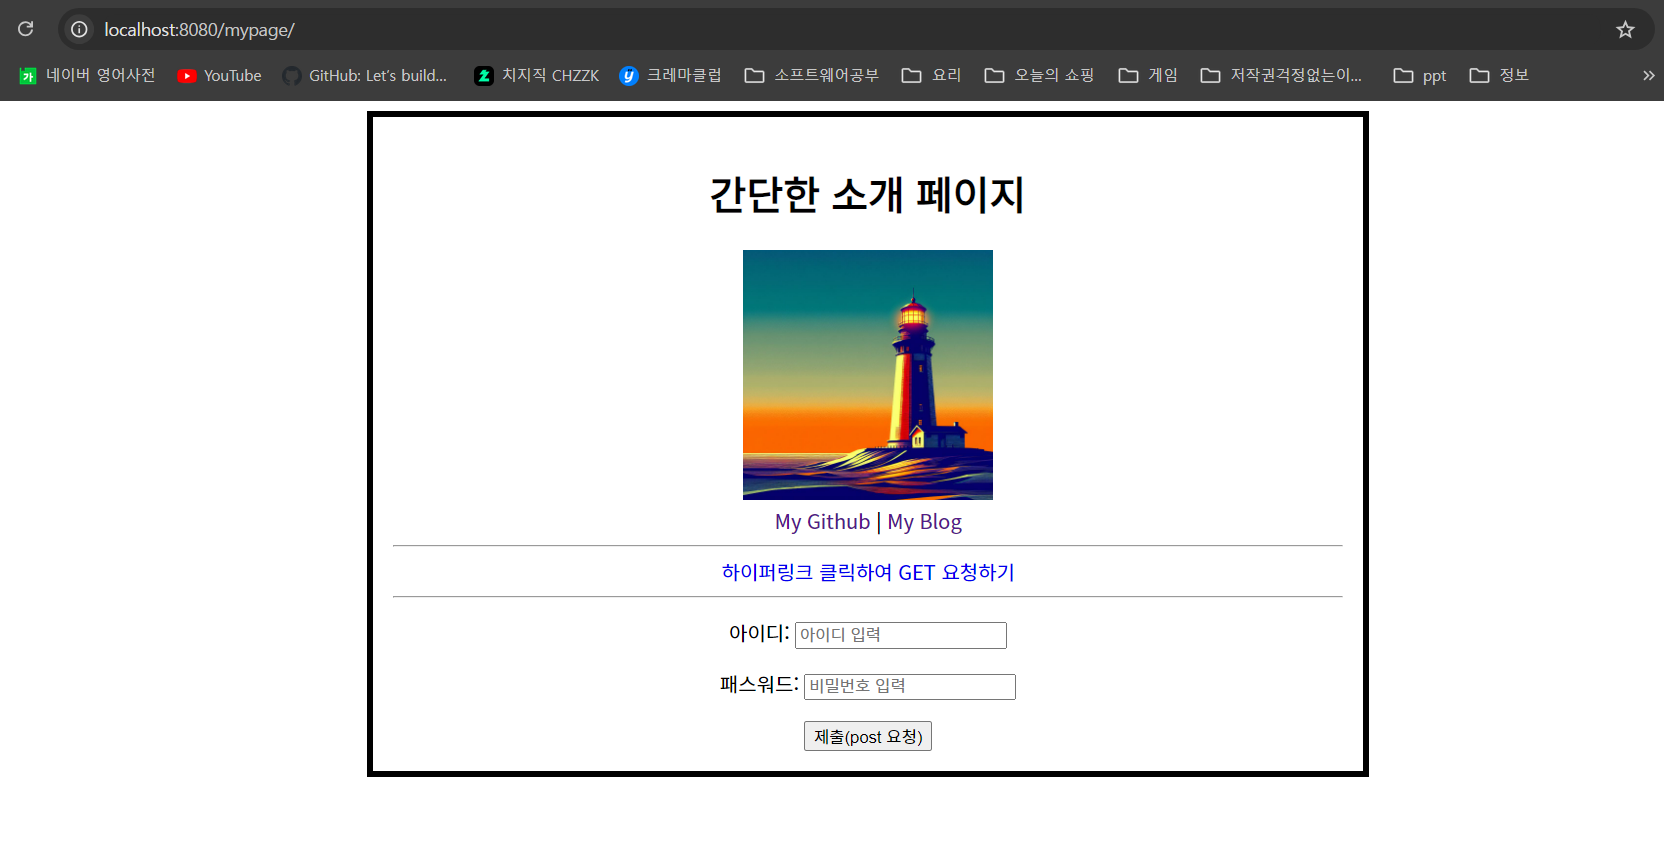
로컬 서버이지만, 그래도 웹 배포가 완료된 것이다.
References
[1] 에이콘아카데미(강남) 강의
This content is licensed under
CC BY-NC 4.0
![]()
![]()
![]()

댓글남기기